Showing posts with label design. Show all posts

Tuesday, June 25, 2013

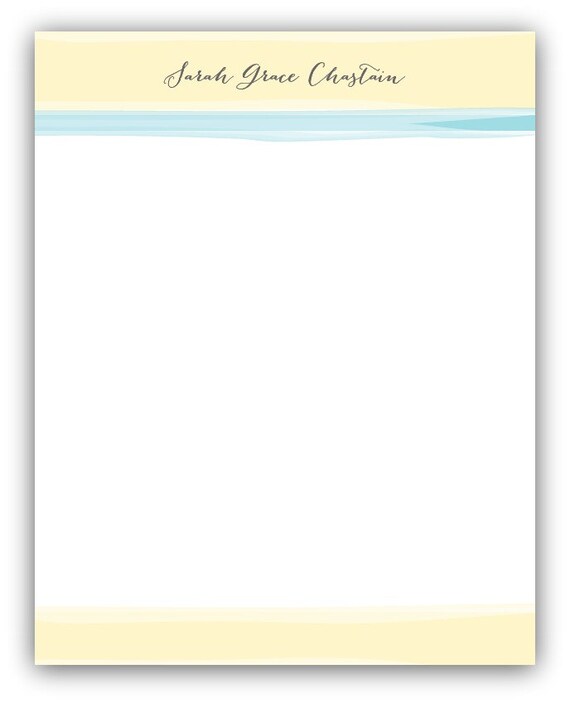
i love snail mail: watercolor stationary

everyday when i get home from work,
i take raider on his little walk,
go to the mail box,
and hope i have a surprise waiting for me!
usually it's just junk mail,
but every so often, a beautiful envelope will be there waiting for me.
i love snail mail!
i love having cute stationary to send notes to friends or include with gifts.
i know how much a little note can change my day, 
and i love being able to share that feeling with others!

do you still write letters?
does snail mail brighten up your day?

visit my etsy shop here: gracefully made designs

Wednesday, September 26, 2012

it's tea time :)

one of my favorite things about fall is drinking warm drinks from huge mugs.
something about warm tea on a cool morning just brings a little peace and joy to my soul.
coffee is pretty yummy as well, but nothing beats a giant mug of slightly sweet lady grey tea.


there is something about china tea cups that makes me feel like i'm taking a trip back in time, drinking tea with the queen or i'm living in a fairy tale. what can i say, i like to play pretend. :)


it is highly likely that the girls in my small group will be receiving something similar to this for christmas. i don't know who wouldn't love a gift like this, and it's so simple to put together. perfect gift for a group!


the ultimate tea pot collection. my heart is melting.

i'm 97% sure i will be having a tea cup display like this in our next apartment. i have the wall already picked out.  what's the point of having cute mugs and containers if you have to keep them behind closed cabinet doors??

cinnamon rolls are the perfect companion for a morning tea party don't you think??
then again, when are cinnamon rolls not perfect??
:)


p.s. i'm participating in my first giveaway! :)
my items are an 8x10 tea cup print and 2 personalized tea mugs! yay!

head over to ms. jen's lovely blog, that's what she read, and check out all of the lovely items and enter the giveaway!!


Thursday, September 20, 2012

flowers made easy

it's ok to be terrible at flower arrangements right?
 
i couldn't create an elaborate flower arrangement if my life depended on it. 
side story,,,
on the morning of my bridesmaid's brunch,
i decided i was going to fill mason jars with lovely flower bunches. i wanted to do it on my own and surprise my mom (since she's fantastic at arranging flowers...) and impress her with my floral skills...
i had a nervous breakdown on the floor of my mama's laundry room.
needless to say, i have a high level of admiration for ladies with flower skills.
 
but really, flowers are lovely on their own, so i love displaying them in simple ways.  i've developed this little method for displaying fresh flowers in my apartment, sans stress and breakdowns.


[one]
find one or two or three buckets with an opening at the top that is smaller than the base.  if you choose a container that is solid, rather than see through, you don't have to worry about the way the stems are laying inside the container.

[two]
go to your grocery store or farmers market and purchase 2-3 bunches of blooms! :) if you're lucky, they will be on sale for $4/bunch. holla!

[three]
fill your buckets a little less than half way with cold water and add the plant food.

[four]
strip the leaves off of each stem.  be careful not to accidently rip off the buds!

[five]
line your flowers up and measure out how much you need to trim them.

[six]
snip snip!
trim a few stems at a time, at an angle. randomly select one stem at a time and create a bunch in your hand, then place in the bucket.

tadaaaaaaaa!
you have a beautiful arrangement for your island or coffee table.
 
here is a less blurry photo of this arrangement with different flowers:
flowers from HEB, bucket from IKEA.
 
and there you have it, flower arrangements for dummies.


Tuesday, August 28, 2012

a lovely baking shower for a lovely bride-to-be

you're invited to a baking shower! :)
what is a baking shower you might ask?
it's just an excuse to eat yummy treats and shower the bride-to-be with gifts to fill her kitchen.

my mama and i hosted a baking themed bridal shower for my sweet friend stephanie.  guests brought so many sweet gifts, and many of them tied in to the recipies they gave her. neat huh?

the colors of the bride-to-be's kitchen are going to be blue and red, such a fun combo! so i designed the invitations and matching recipe cards to reflect this theme.


along with the invitations, guests were given two recipe cards to fill out and give back to the bride.  she received so many yummy recipes!! i wanted to keep them all!  there is something so sweet about having  the ladies in your life share their kitchen secrets.


i was really happy with the size and spacing of these cards.  they had enough room to hold detailed directions, and the lines were well spaced, even if the person writing has large handwriting like me. :)


the back of the recipe cards had a giant "d" for the bride-to-be's new last name! :)

i found plain, bamboo kitchen utensils at the grocery store and painted the handles to match the theme. my mom came up with the fabulous idea of tying them to the plate handles.
the bride said she is going to display them on hooks above her stove. isn't that a great idea!?

the guest's favors were recipe cards for two of the items that were served at the shower:
limeaid punch and chicken caesar salad bites.

we used all white flowers, white and blue plates, and white and silver serving pieces.  the white table cloth provided a clean backdrop for all of the red and blue accents and the yummy food! :)

the yummy bite-sized menu included:
shortbread dot cookies
raspberry spritz cookies
mini ham sandwiches
chicken caesar salad bites
chocolate pinwheels
vanilla gem muffins
fruit tarts with blueberries and raspberries
limeaid punch with fresh raspberries
aren't the flowers beautiful? my mama is so great at arranging flowers, i wish i had even a few of her skills!

just a few photos of me with my mama, and with the beautiful bride-to-be! and we all matched, aren't we the cutest?!

are you hosting a shower anytime soon?
if you're interested in personalized invitations, send me an email and i'd love to work with you! :)
gracefullymadeblog[at]gmail.com


Thursday, August 9, 2012

nature made jewelry holder

last weekend when i was home,
i noticed a rather large pile of logs chillin out side my parent's garage.
maybe i'm still recovering from wedding craft planning mode,
but everytime i see a pile of sticks or wood,
i immediately feel an urge to run over and pick them up for projects.
[what...your wedding day dreams aren't filled with sticks and tree limbs?? pshhh...just wait till i get around to posting those photos.]
anywho.
i just knew i could use one of those mini logs for something!
and then i remembered this pin:


[insert skies opening up and angels singing lovely melodies...and the bub-hub saying..."when are you going to stop wanting to decorate our apartment with dirty sticks?" true love lets you act a little nutty.]

here is my attempt at a recreation:
123

1. all you need is a branch, hammer, twine or rope, a nail, and a few eye hooks.
i used eye hooks because i think they hold things better, but nails would work just fine.

2.  lay your branch down and plan where you want to place your hooks. my branch was rock solid, so i used a nail to make pre-holes. 

3. if your branch has little twigs on it, try to place your nails in a place that compliments the twigs, because they can be used to hold things as well.  the tiny twigs are perfect for rings.

45

4.  screw your eye hooks tightly into the branch.  don't force them in, but you want them to be secure so they don't fall out when you hang your beautiful but heavy bubble necklace on it.
when we were kids, we had to worry about heavy backpacks,,,,now, it's the bubble necklace. our poor backs just can't catch a break.

5.  wrap your twine or string around the branch and then secure to the wall.
i just used nails to hang it, but i think it would be cute to use a small curtain rod,
or maybe even paint the branch white or black...hmmm...
i added an extra string between to hang my earrings.
this is workin out great because now i can see all my options!


there's my little creation!
and it only took about 30 minutes.
yay for fast-crafts!
pinterest project for the win.



Tuesday, July 24, 2012

please push my button :)

well hello there!

as i mentioned on sunday, i've finally updated my blog header and have a blog button!
yay!
i've been working and fixing and re-doing and re-working and finally settled on something i loved.

now, i'm so excited to be able to swap buttons with other bloggers!
if you're interested in swapping buttons with me,
send me an email at
gracefullymadeblog[at]gmail.com
and we can make it happen!